Using Globus with VISION
Instructions to help you utilize Globus tools to move data in and out of VISION easily and effectively.
VISION Storage
The VISION supercomputer has several storage systems for use. They are:
- A Data Direct Networks fast scratch system to support high-throughput, parallel read/write storage services for active, project-based, computational jobs workloads. This storage system is not for long-term file retention and is not backed up. Quotas for this storage will need to be requested and approved based on research project needs. Shared, persistent data sets (e.g. Census data) will also be supported on this system on a case-by-case basis.
- A Pure Storage network file system to support long-term storage of user home directories. Quotas for this are limited to ensure that VISION does not become an archive storage system for research data.
Quickstart in Using Globus
More extensive information on using Globus can be found in the Globus Documentation(opens in new window).
Globus Web Interface
Step 1: Make sure you can log into Globus.org
Globus functions mostly like a brokerage service in that you use it to initiate data movements between endpoints, but the data does not flow through Globus servers. To use Globus, visit globus.org(opens in new window) and click on the LOG IN(opens in new window) button at the upper right of the web page.
This will present you with a login window that looks like the following:
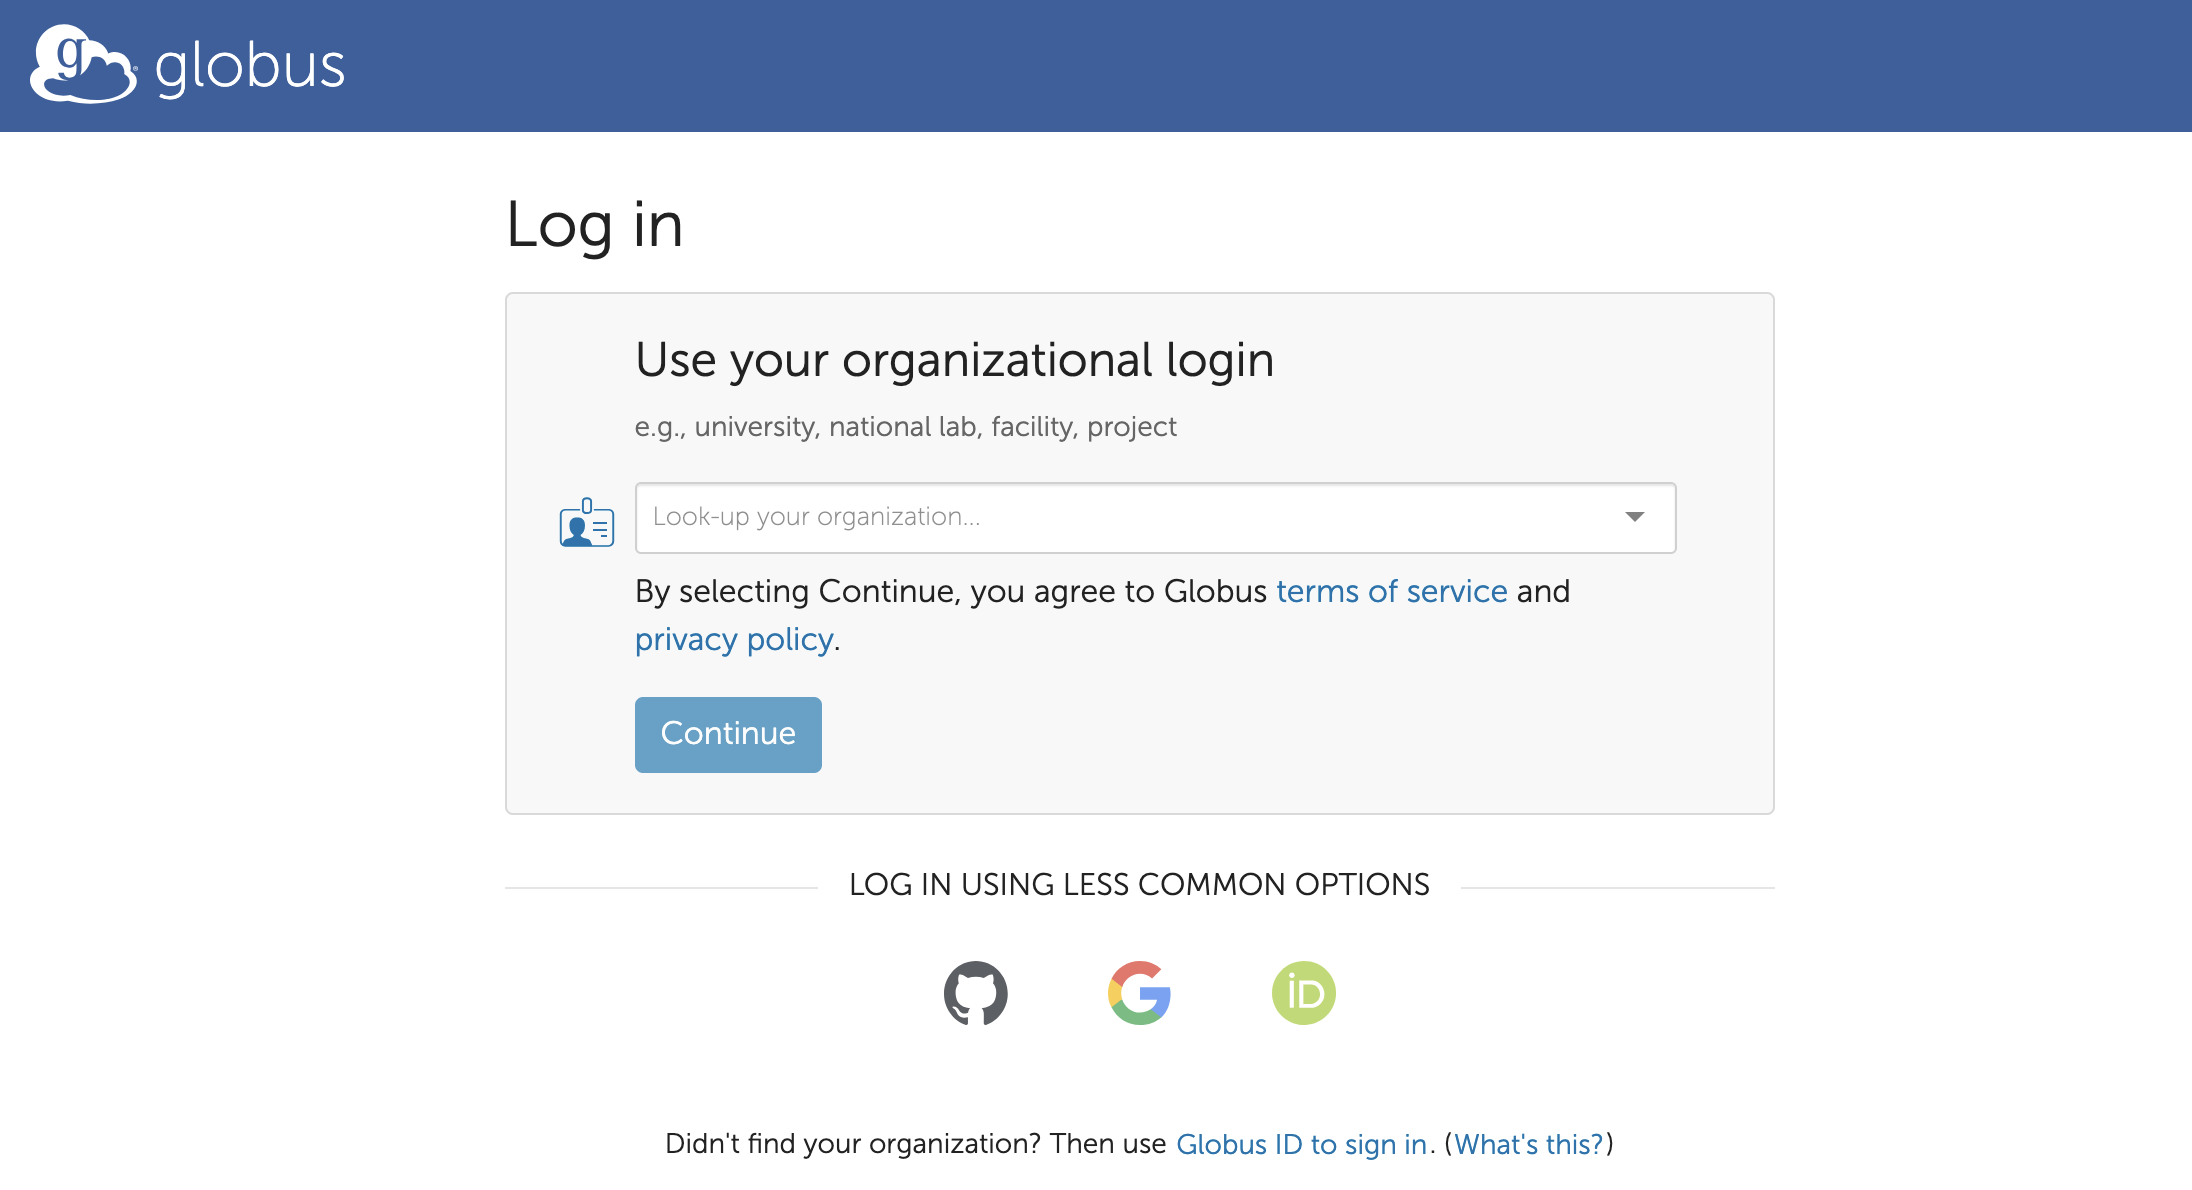
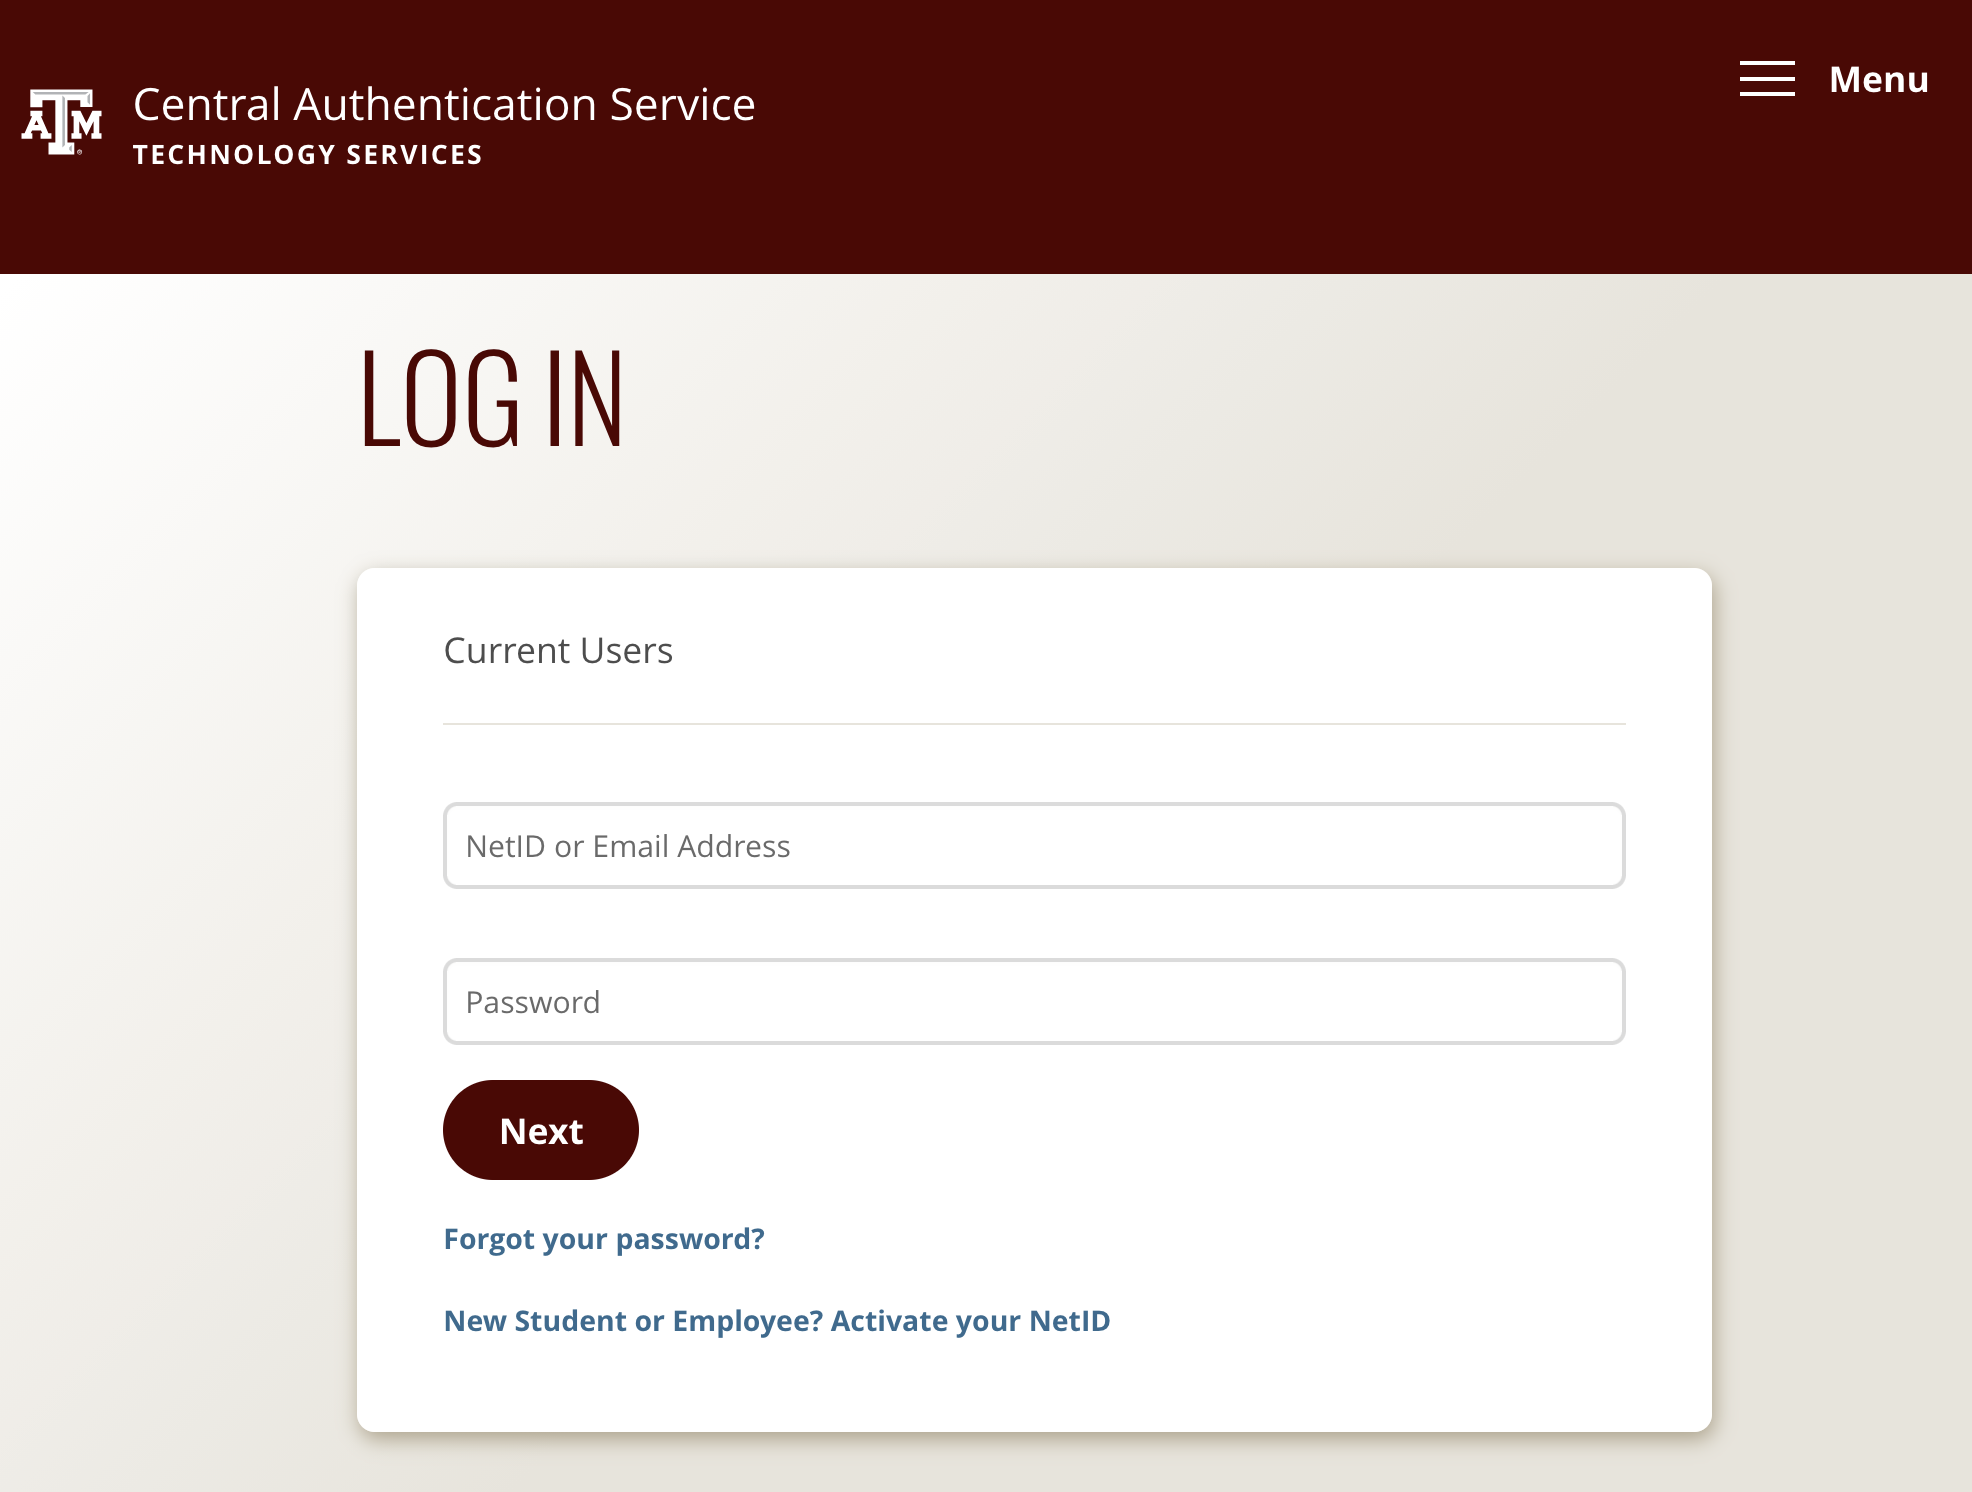
From there, select your Organization (e.g. Texas A & M University, note the spaces on both sides of the "&") and click Continue. Because of your selection of your Organization, you will be taken to an authentication that you can log into. For Texas A&M University, this is the Central Authentication Service, and it looks like the following:
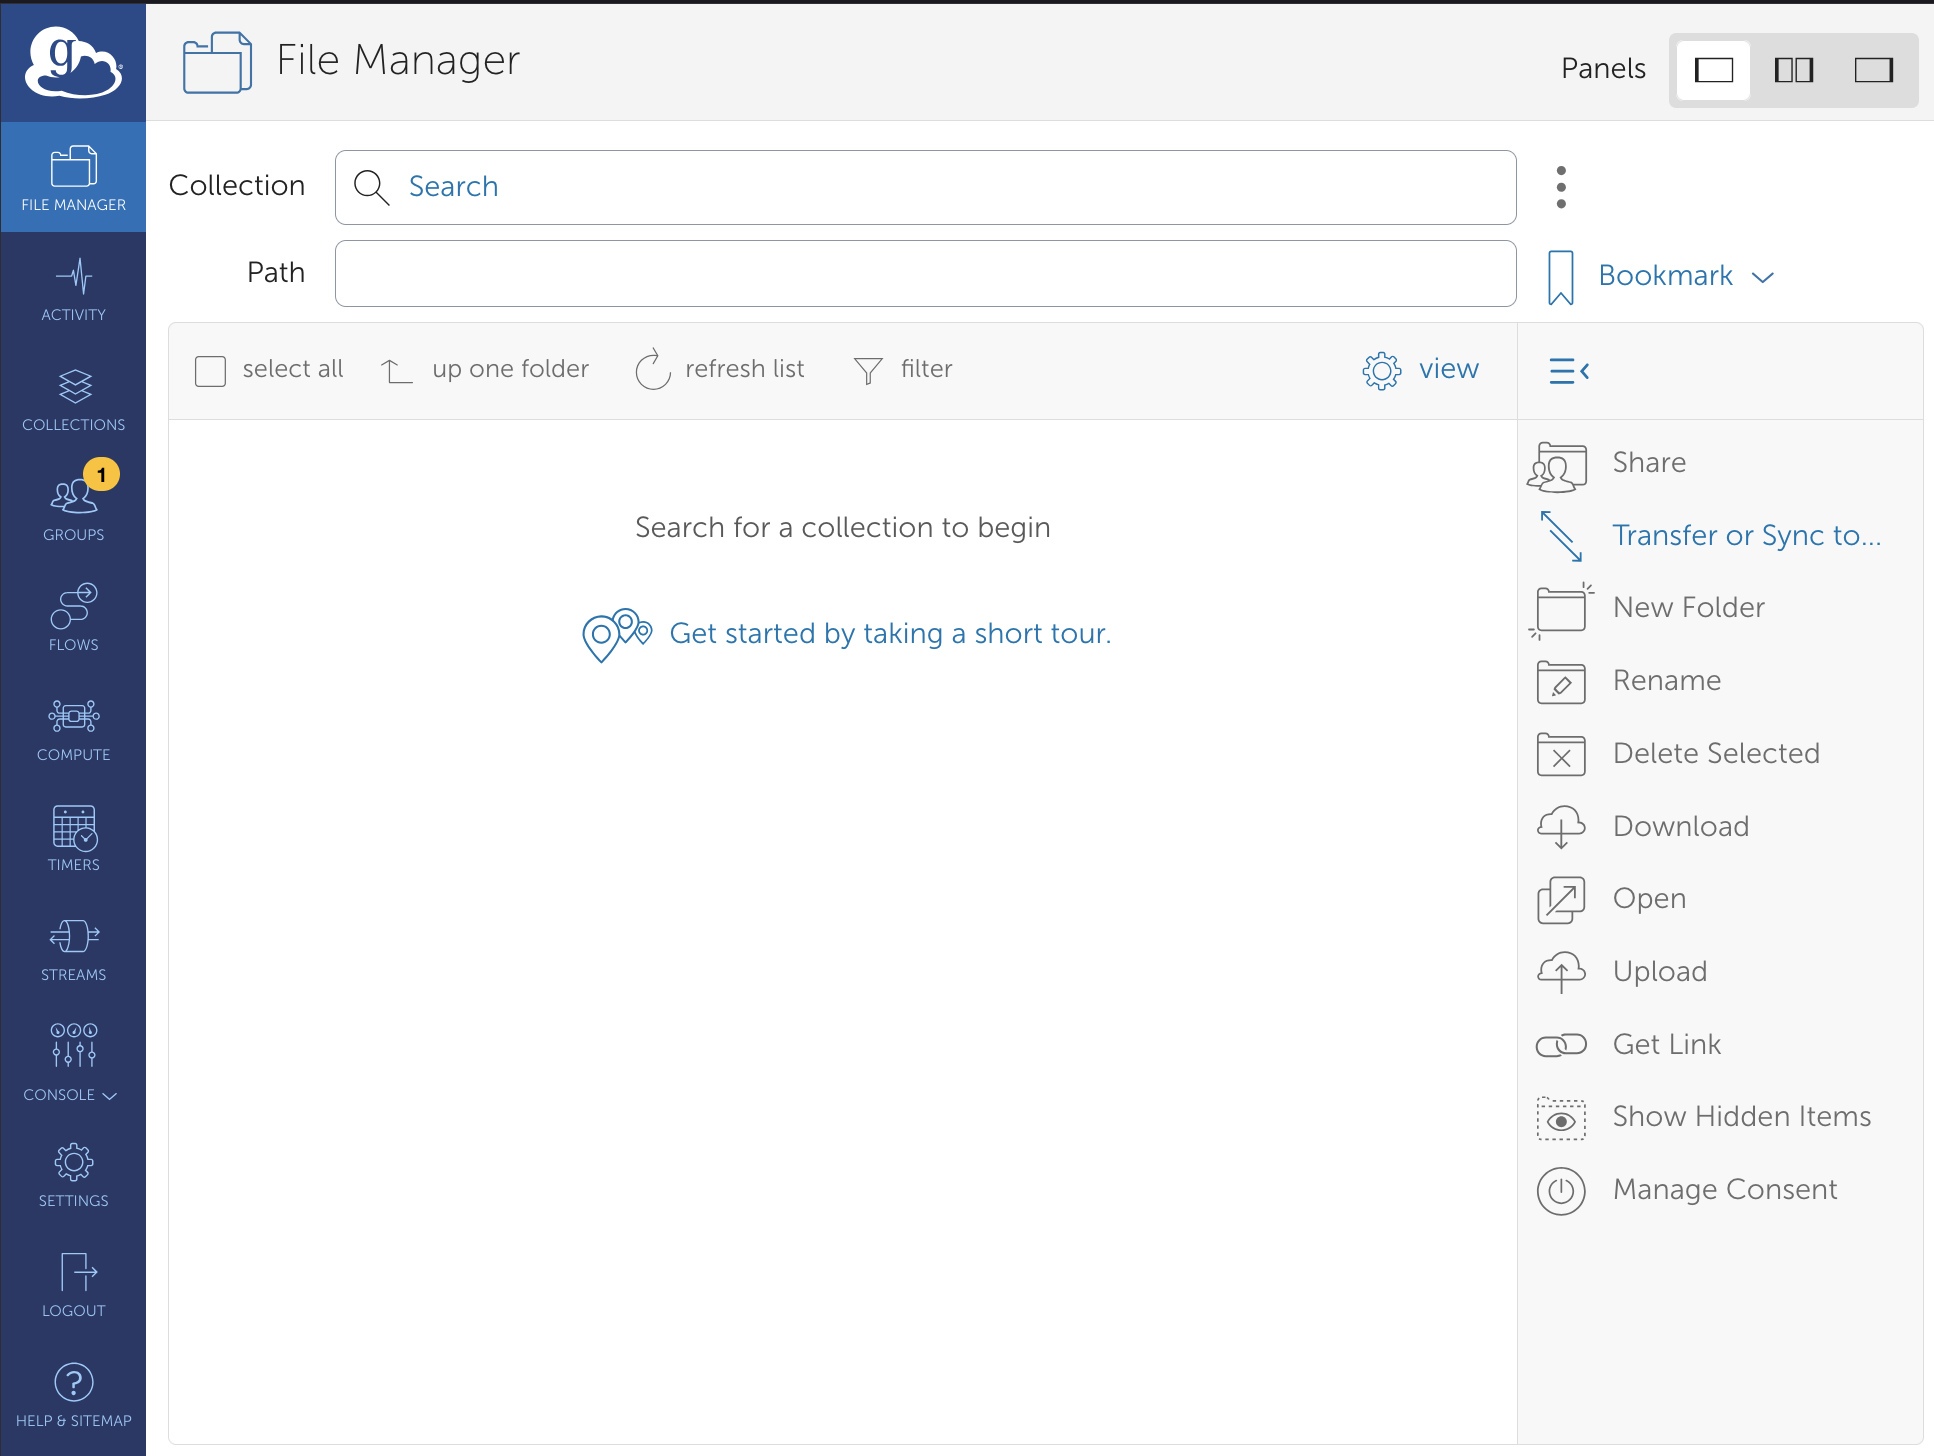
After a successful login, you will be presented with the Globus File Manager screen.
Step 2: Search for Globus Collections
In the Collection window, where it says "Search," enter the name the VISION Supercomputer as follows:
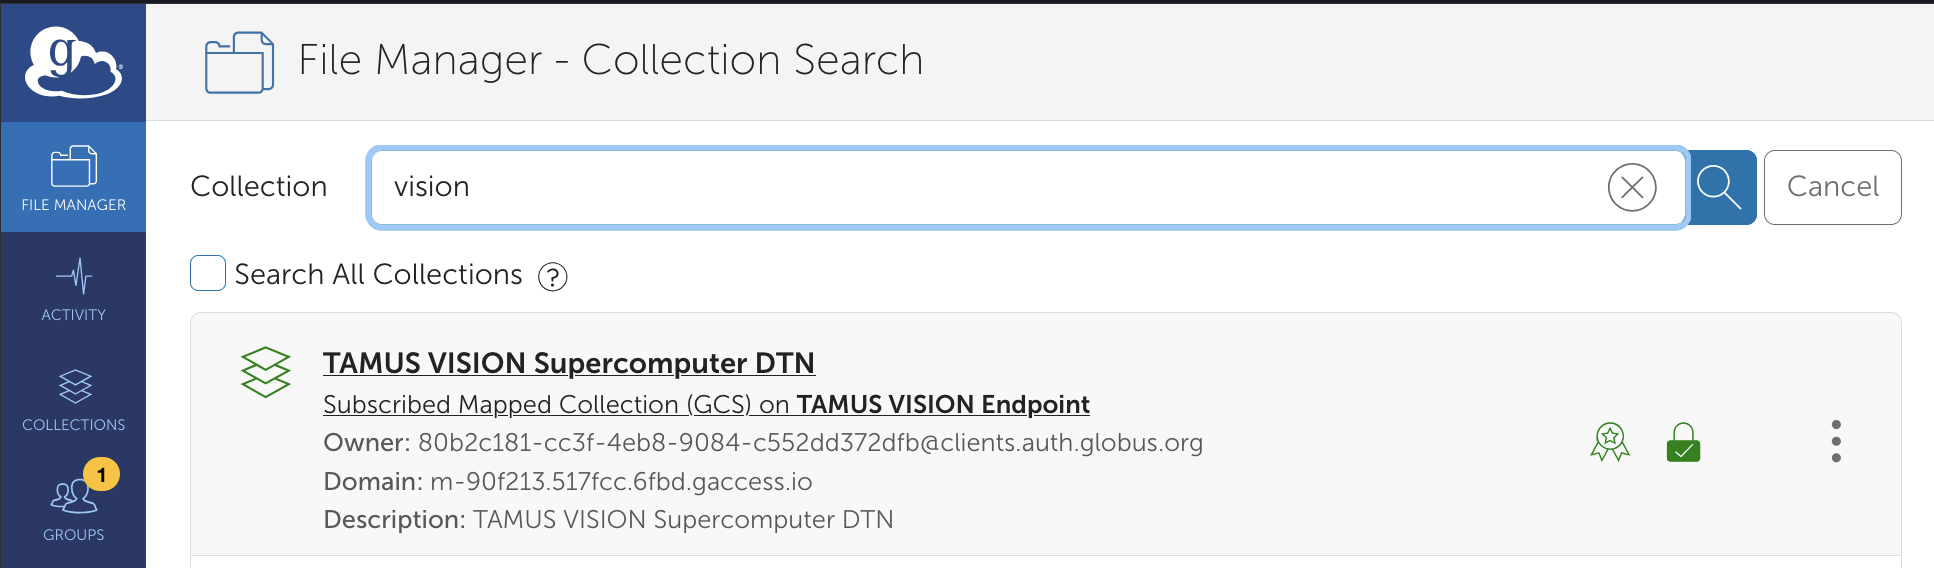
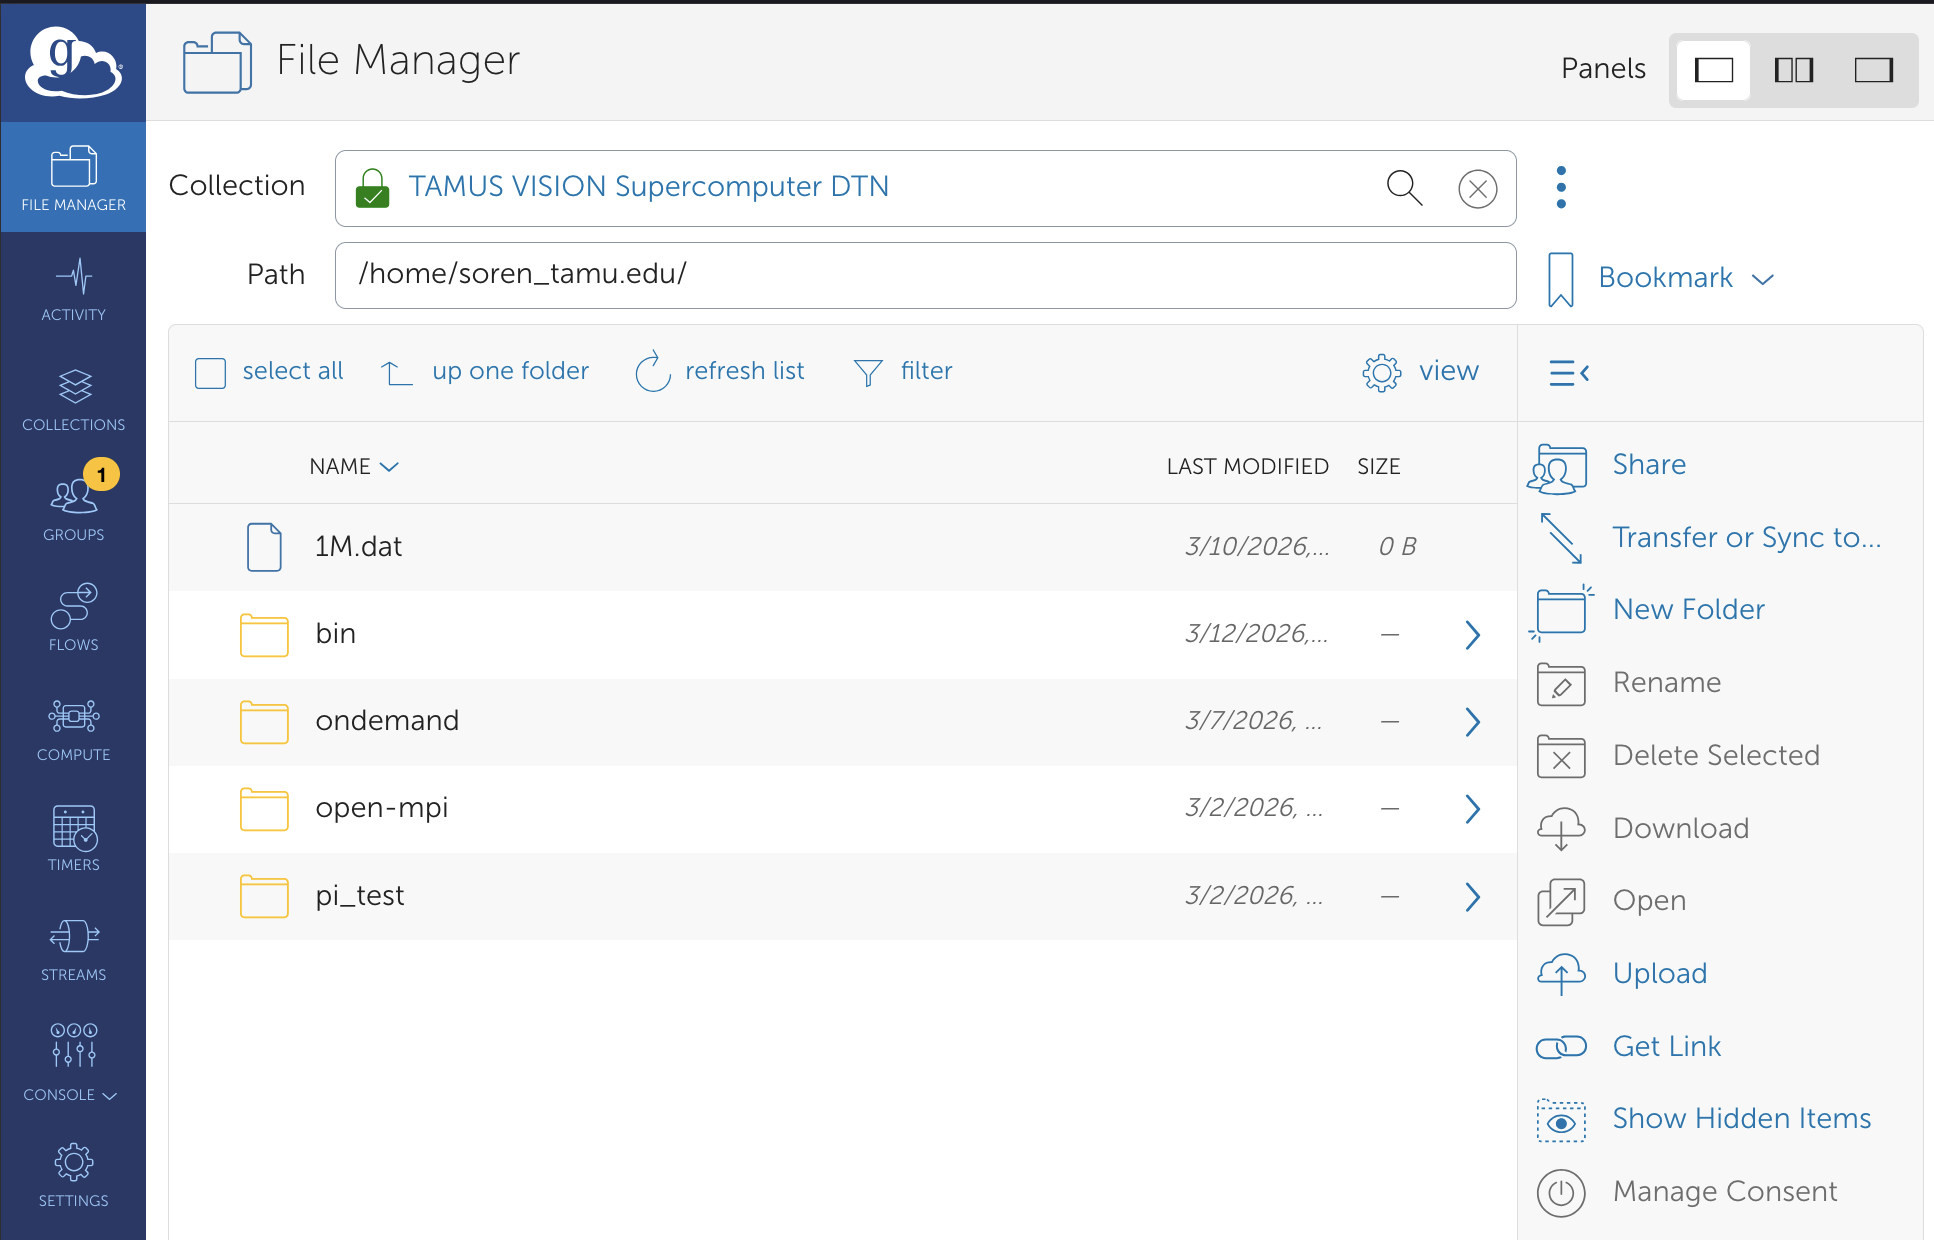
Form there, you can select the TAMUS Vision Supercomputer DTN(opens in new window) (or click on the link) and Globus will make a connnection to the VISION Globus endpoint and will show you the files in your VISION home directory:
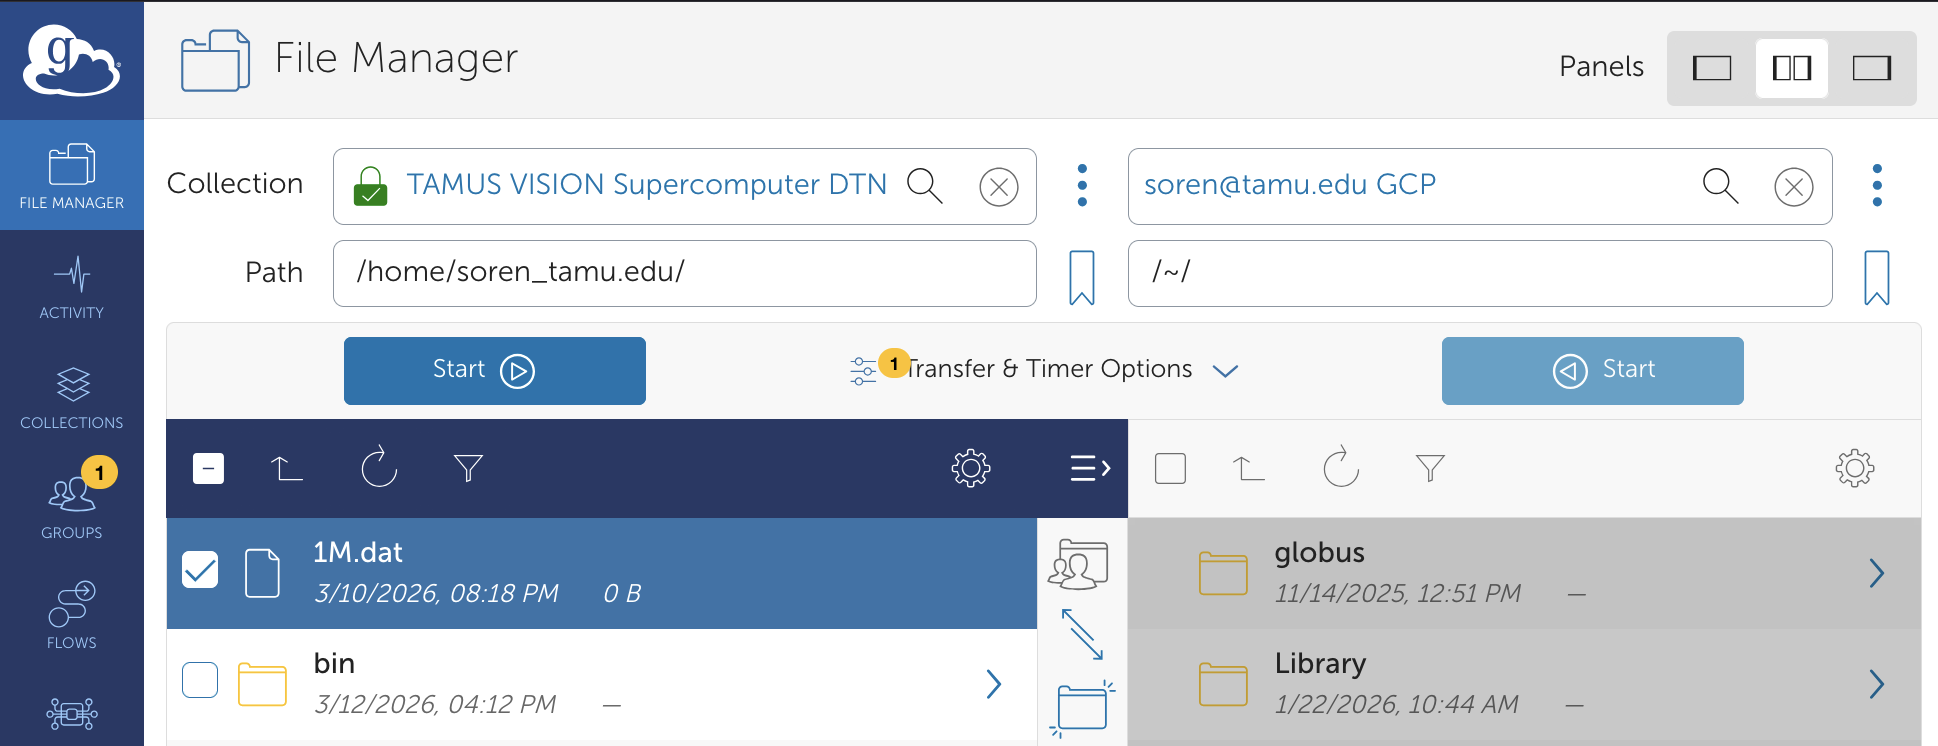
If you already have a Globus Collection where you want to retrive or send data, you can click on the middle icon in the Panels selector menu in the upper right of the Globus File Manager window:

This will open a second Search window where you can locate your other Globus collection. In many cases, this may be your desktop or laptop, where you can run Globus Connect Personal (GCP)(opens in new window).
If you find the overlapping vertical menu annoying, you can suppress it by selecting the ![]() icon.
icon.
Step 3: Select files and start transfers
Now, you can select files or folders on either side of the Globus File Manager window. Once selected, you can press the  to begin a transfer:
 .
.
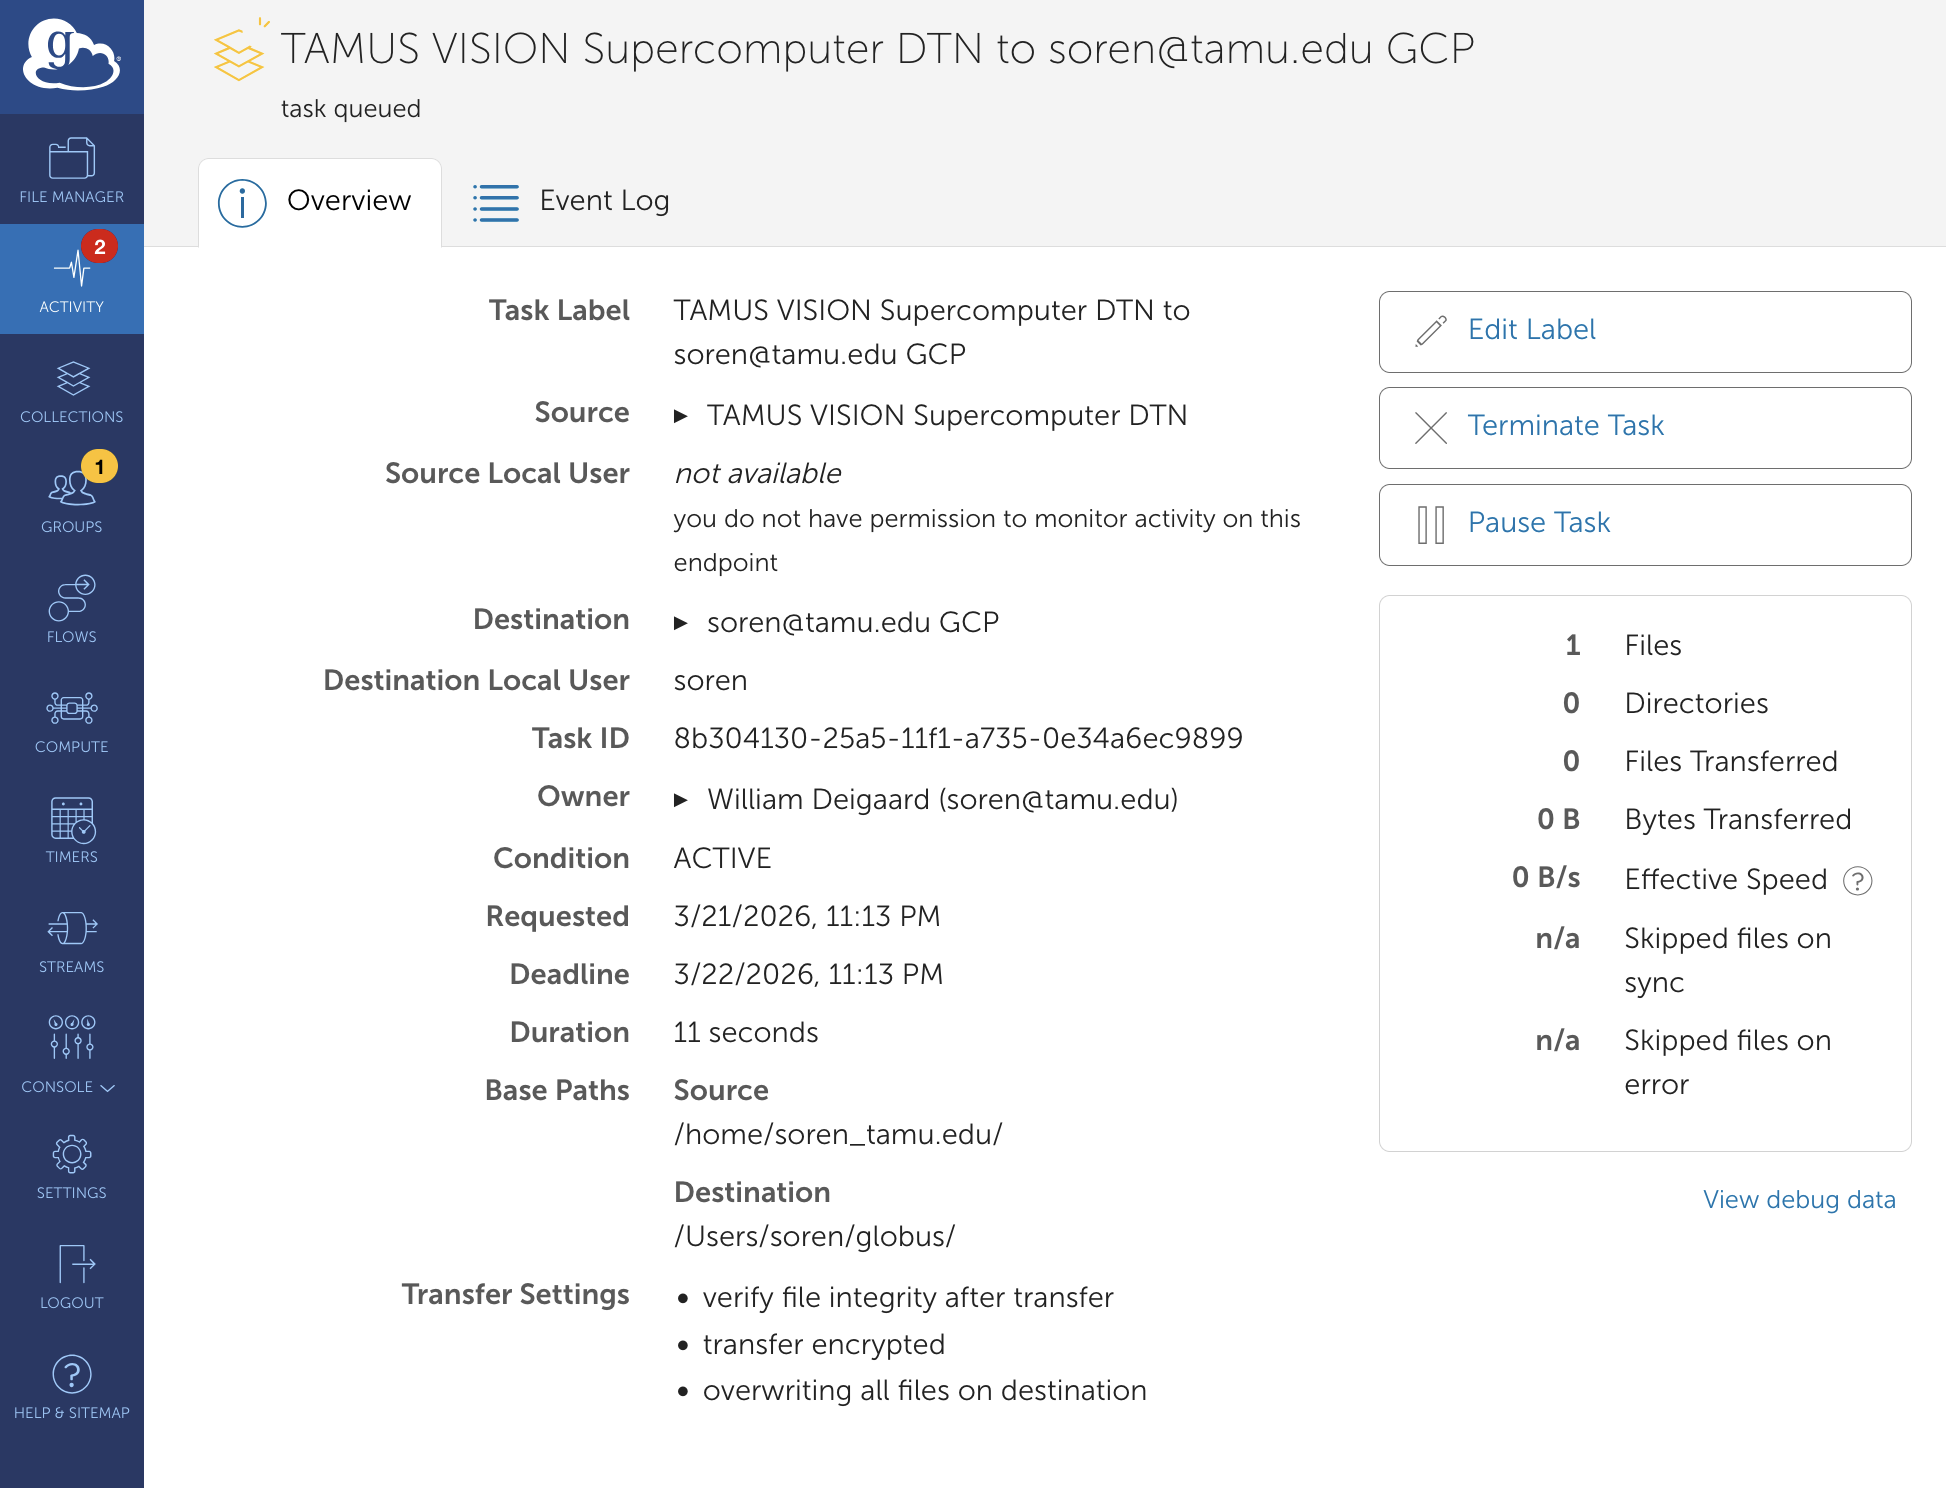
Step 4: Verify that transfers have completed.
After the transfer starts, you can see the details by selecting "view details >" from the popup box:
 .
.
This will open a window that shows the full details of the transfer. Once started, the transfer is in condition ACTIVE.
 .
.
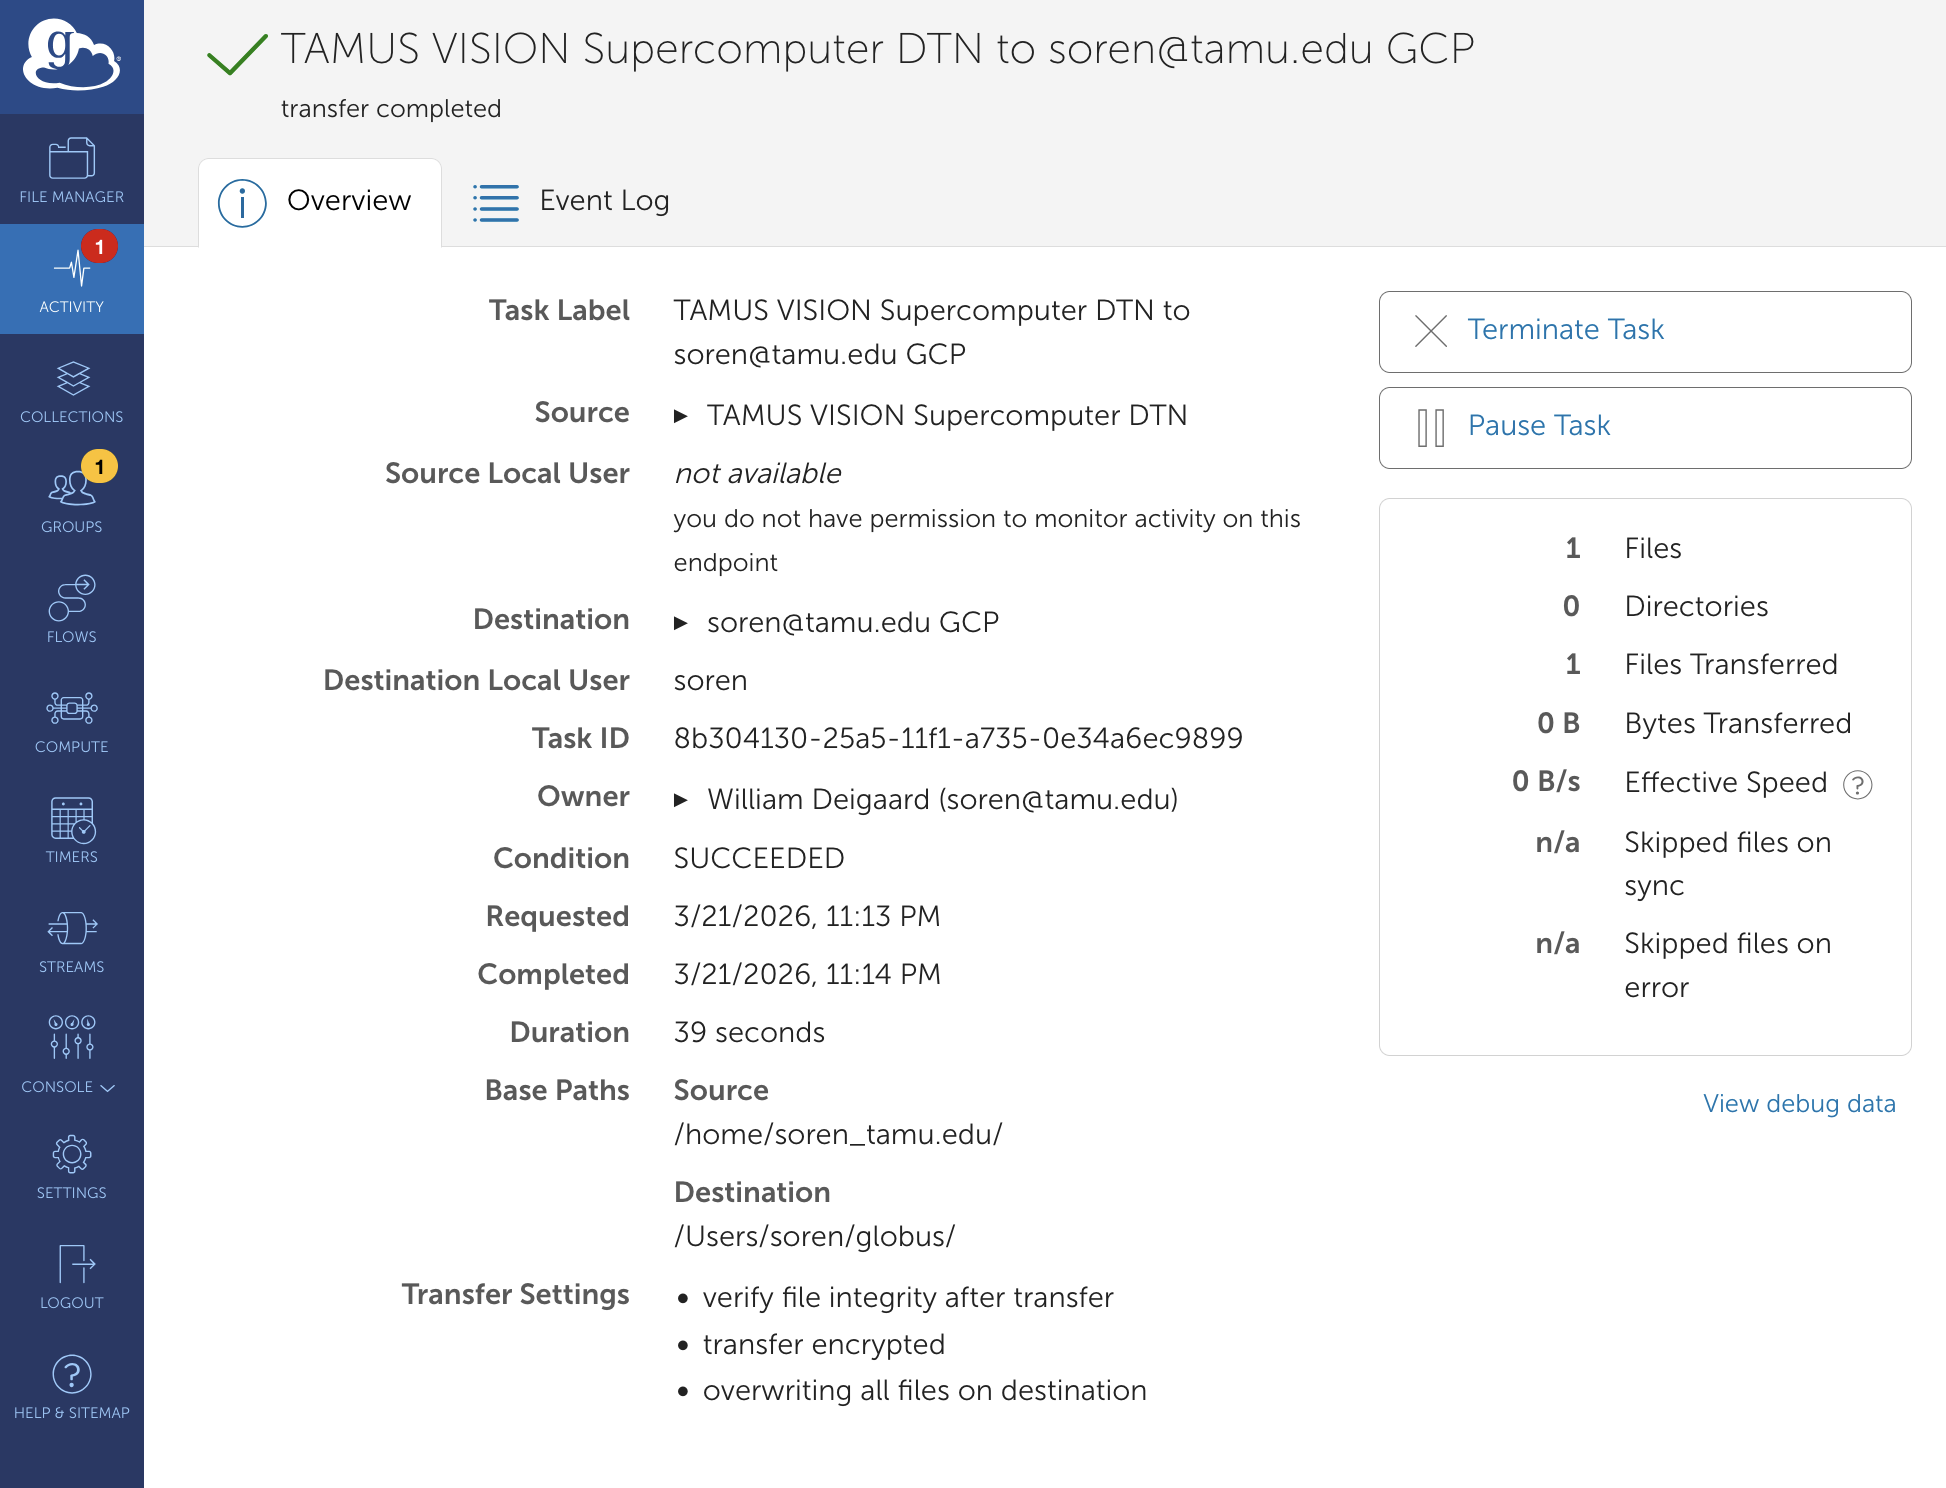
Upon completion, the details show the final results, and the transfer is in condition SUCCEEDED.
 .
.
Globus Command Line Interface (CLI)
For many users, using a command line is much more efficient and easy to use, especially for frequent transfers. Fortunately, Globus provides a CLI for these activities.
Step 1: Prepare for CLI installation
Full documentation on the use of the Globus CLI can be found in the Globus CLI docs(opens in new window).
The fastest way to get started is to utilize the uv system, an extremely fast Python package and project manager that was written in Rust. To install uv on most unix platforms:
curl -LsSf https://astral.sh/uv/install.sh | sh
Step 3: Install/Use the CLI
Once uv is installed, you can then use the Globus CLI easily:
uvx --from globus-cli globus --help
This will provide you with multiple options:
Usage: globus [OPTIONS] COMMAND [ARGS]...

  Interact with Globus from the command line

  All `globus` subcommands support `--help` documentation.

  Use `globus login` to get started!

  The documentation is also online at https://docs.globus.org/cli/

Options:
  -v, --verbose                  Control level of output, make it more
                                 verbose.
  --quiet                        Suppress non-essential output. This is higher
                                 precedence than `--verbose`.
  -h, --help                     Show this message and exit.
  -F, --format [unix|json|text]  Output format for stdout. Defaults to text.
  --jmespath, --jq TEXT          A JMESPath expression to apply to json
                                 output. Forces the format to be json
                                 processed by this expression.
  --map-http-status TEXT         Map HTTP statuses to any of these exit codes:
                                 0,1,50-99. e.g. "404=50,403=51"

Commands:
  api               Make API calls to Globus services.
  bookmark          Manage endpoint bookmarks.
  cli-profile-list  List all CLI profiles which have been used.
  collection        Manage your Collections.
  delete            Submit a delete task (asynchronous).
  endpoint          Manage Globus endpoint definitions.
  flows             Interact with the Globus Flows service.
  gcp               Manage Globus Connect Personal endpoints.
  gcs               Manage Globus Connect Server (GCS) resources.
  get-identities    Lookup Globus Auth Identities.
  group             Manage Globus Groups.
  list-commands     List all CLI Commands.
  login             Log into Globus to get credentials for the Globus CLI.
  logout            Logout of the Globus CLI.
  ls                List endpoint directory contents.
  mkdir             Create a directory on an endpoint.
  rename            Rename a file or directory on an endpoint.
  rm                Delete a single path; wait for it to complete.
  search            Use Globus Search to store and query for data.
  session           Manage your CLI auth session.
  stat              Get the status of a path.
  streams           Manage Globus Tunnels.
  task              Manage asynchronous tasks.
  timer             Schedule and manage timers in Globus Timers.
  transfer          Submit a transfer task (asynchronous).
  update            Update the Globus CLI to its latest version.
  version           Show the version and exit.
  whoami            Show the currently logged-in identity.
To make your life easier, you can create an alias:
alias glb='uvx --from globus-cli globus'
Step 3: Log into Globus
To use Globus services, you need to first log into Globus. You can do this by entering:
uvx --from globus-cli globus login
If you have been logged in previously (or are still logged in), you amy need to reauthenticate your session:
uvx --from globus-cli globus session update tamu.edu globus.org globusid.org clients.auth.globus.org
Step 4: Search for endpoints
Similar to the Web UI for Globus, you must initially search for your endpoints. With the CLI, however, it's best to assign the endpoing GUIDs to environment variables so that you can more easily see the source and destination collections in the below example, we are searching for VISION and a GCP collection:
export VISION=$(uvx --from globus-cli globus \
   endpoint search "TAMUS VISION Supercomputer DTN" --format json \
   | uvx jq -r '.DATA[0].id')

export OTHER=$(uvx --from globus-cli globus \
   endpoint search "ESnet CERN DTN (Anonymous read-only testing)" --format json \
   | uvx jq -r '.DATA[0].id')

echo VISION ID: $VISION
echo Other Globus Collection ID: $OTHER
Step 5: List directories on each collection
It's always a good idea to check the default paths for the Globus collections that you will be using. For our example, you can look at VISION and the OTHER collection (a CERN testing collection):
echo "VISION files before transfer"
echo "----------------------------"
uvx --from globus-cli globus ls "$VISION"
echo "OTHER/CERN files"
echo "----------------"
uvx --from globus-cli globus ls "$OTHER"
Step 4: Transfer a file (or folder)
Note that although the examples below are using your home directory on VISION, most transfers that you perform will need to specify a project path on the fast-scratch filesystem. The starting syntax for this is generally:
uvx --from globus-cli globus ls "$VISION":/scratch/project/<PROJECT_FOLDER>
Now that you know the directory structure of the two collections, you can safely start a transfer:
uvx --from globus-cli globus transfer $OTHER:1M.dat $VISION:1M.dat
This will show an output similar to the following:
Message: The transfer has been accepted and a task has been created and queued for execution
Task ID: b3255b64-25ab-11f1-bd0d-0affe9efaee5
You can then use this Task ID to see the results of the transfer:
uvx --from globus-cli globus task show b3255b64-25ab-11f1-bd0d-0affe9efaee5
The output will be similar to the following:
Label:                        None
Task ID:                      b3255b64-25ab-11f1-bd0d-0affe9efaee5
Is Paused:                    False
Type:                         TRANSFER
Directories:                  0
Files:                        1
Status:                       SUCCEEDED
Request Time:                 2026-03-22T04:58:01+00:00
Faults:                       0
Total Subtasks:               2
Subtasks Succeeded:           2
Subtasks Pending:             0
Subtasks Retrying:            0
Subtasks Failed:              0
Subtasks Canceled:            0
Subtasks Expired:             0
Subtasks with Skipped Errors: 0
Completion Time:              2026-03-22T04:58:09+00:00
Source Endpoint:              ESnet CERN DTN (Anonymous read-only testing)
Source Endpoint ID:           722751ce-1264-43b8-9160-a9272f746d78
Destination Endpoint:         TAMUS VISION Supercomputer DTN
Destination Endpoint ID:      9ca1ae10-0b90-471a-a7ab-9b036327f1c3
Bytes Transferred:            1000000
Bytes Per Second:             128638
echo "VISION files after transfer"
echo "---------------------------"
uvx --from globus-cli globus ls "$VISION"
This will show the 1M.dat file now available on VISION:
VISION files after transfer
---------------------------
bin/
ondemand/
open-mpi/
pi_test/
1M.dat
Globus in a SLURM Batch Job
Under development.